How to Use Acrylic Powder: A Comprehensive Guide to Perfect Nails
Are you looking to achieve salon-quality nails at home? Mastering the art of acrylic nails starts with understanding **how to use acrylic powder** correctly. This comprehensive guide will take you through every step, from preparation to finishing touches, ensuring you achieve beautiful and long-lasting results. We’ll not only cover the basics but also delve into advanced techniques and troubleshooting tips, providing you with the knowledge and confidence to create stunning nail designs. Unlike other resources, we’ll focus on best practices gleaned from years of hands-on experience and expert consensus, ensuring you avoid common pitfalls and achieve professional-looking results every time. You’ll learn about the best products, proper application techniques, and crucial maintenance tips to keep your acrylic nails looking flawless.
Understanding Acrylic Powder: The Foundation of Beautiful Nails
Acrylic powder is the cornerstone of acrylic nail enhancements. It’s a polymer (a type of plastic) that, when mixed with a liquid monomer, creates a pliable substance that can be sculpted onto the natural nail or a nail form to extend its length. Understanding the properties of acrylic powder is crucial for successful application.
What is Acrylic Powder?
Acrylic powder consists of tiny polymer beads. These beads are activated when combined with a liquid monomer, causing them to bind together and form a hardened acrylic nail. The powder comes in various colors, from clear and pink to a wide range of vibrant shades and glitter-infused options. The choice of powder depends on the desired look and application technique.
The Science Behind the Polymerization Process
The magic of acrylic lies in the polymerization process. When the liquid monomer (usually ethyl methacrylate or EMA) is mixed with the acrylic powder, a chemical reaction occurs. This reaction causes the monomer molecules to link together, forming long chains of polymers. This process is what hardens the acrylic into a durable, nail-enhancing material. Temperature and humidity can affect the speed of this reaction, so understanding your environment is key.
Why Acrylic Powder Remains a Popular Choice
Acrylic nails have been a popular choice for decades due to their durability, versatility, and affordability. They offer a strong and long-lasting alternative to natural nails, making them ideal for individuals with brittle or short nails. Acrylics also provide a blank canvas for intricate nail art designs, allowing for endless creativity. Recent trends indicate a resurgence in DIY acrylic application, driven by online tutorials and the availability of professional-grade products for home use.
The Essential Tools for Acrylic Application
Before diving into the application process, it’s essential to gather the necessary tools. Having the right equipment will make the process smoother and more efficient, leading to better results.
- **Acrylic Powder:** Choose a high-quality acrylic powder in your desired color.
- **Monomer Liquid:** Opt for a reputable brand of monomer liquid, as this will affect the strength and durability of your acrylics.
- **Acrylic Brush:** A good quality acrylic brush is crucial for picking up and applying the acrylic mixture. Look for a brush with natural kolinsky sable bristles.
- **Nail File and Buffer:** These are essential for shaping and smoothing the acrylic nails.
- **Nail Primer:** Primer helps the acrylic adhere to the natural nail and prevents lifting.
- **Nail Forms or Tips:** Use nail forms to sculpt extensions or tips to add length quickly.
- **Dappen Dish:** A small glass dish to hold the monomer liquid.
- **Cuticle Pusher:** To gently push back the cuticles before application.
- **Cuticle Oil:** To hydrate the cuticles after application.
- **Dust Brush:** To remove dust and debris during the application process.
Step-by-Step Guide: How to Use Acrylic Powder for Nail Enhancements
Now, let’s get into the step-by-step process of applying acrylic powder. Follow these instructions carefully for the best results.
Step 1: Nail Preparation – The Foundation for Success
Proper nail preparation is crucial for ensuring the acrylic adheres correctly and prevents lifting.
- **Cleanse Your Hands:** Wash your hands thoroughly with soap and water to remove any oils or dirt.
- **Push Back Cuticles:** Gently push back your cuticles with a cuticle pusher. Avoid cutting your cuticles, as this can increase the risk of infection.
- **Buff the Nail Surface:** Lightly buff the surface of your natural nails to remove the shine. This creates a rough surface for the acrylic to adhere to.
- **Dehydrate the Nails:** Use a nail dehydrator to remove any remaining oils or moisture from the nail surface.
- **Apply Nail Primer:** Apply a thin layer of nail primer to each nail. This helps the acrylic adhere to the natural nail and prevents lifting.
Step 2: Applying Nail Forms or Tips – Creating the Desired Length
If you want to add length to your nails, you’ll need to apply nail forms or tips.
Using Nail Forms:
- **Attach the Nail Form:** Carefully attach the nail form to the edge of your natural nail, ensuring it fits snugly and aligns with the natural nail shape.
- **Secure the Form:** Make sure the form is securely attached and doesn’t move during the application process.
Using Nail Tips:
- **Choose the Right Size:** Select nail tips that fit your natural nail size.
- **Apply Adhesive:** Apply a small amount of nail adhesive to the well of the nail tip.
- **Attach the Tip:** Carefully attach the tip to your natural nail, holding it in place for a few seconds until the adhesive dries.
- **Trim and Shape:** Trim the tip to your desired length and shape using nail clippers or scissors.
- **Blend the Tip:** Use a nail file to blend the tip seamlessly with your natural nail.
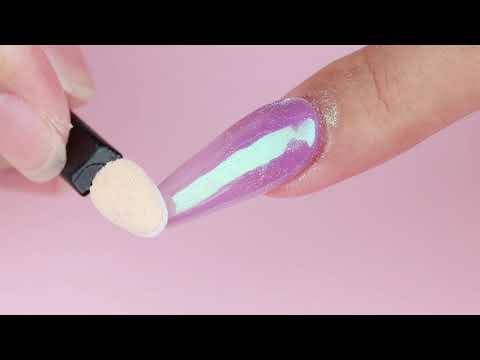
Step 3: Mixing and Applying the Acrylic – The Art of Sculpting
Now comes the crucial step of mixing and applying the acrylic.
- **Pour Monomer:** Pour a small amount of monomer liquid into your dappen dish.
- **Dip the Brush:** Dip your acrylic brush into the monomer liquid, ensuring it’s fully saturated.
- **Pick Up Acrylic Powder:** Gently tap the brush into the acrylic powder, allowing the powder to form a small bead on the brush.
- **Apply the Acrylic:** Apply the bead of acrylic to your nail, starting at the cuticle area and working your way towards the free edge.
- **Shape the Acrylic:** Use the brush to shape the acrylic, creating a smooth and even surface. Work quickly, as the acrylic will start to harden within a few minutes.
- **Repeat:** Repeat the process, applying additional beads of acrylic until you achieve the desired thickness and shape.
Step 4: Shaping and Refining – Achieving Perfection
Once the acrylic has hardened, it’s time to shape and refine the nails.
- **File the Nails:** Use a nail file to shape the nails to your desired shape. Common shapes include square, oval, almond, and stiletto.
- **Buff the Surface:** Use a nail buffer to smooth the surface of the acrylic nails, removing any imperfections.
- **Clean the Nails:** Use a dust brush to remove any dust or debris from the nails.
Step 5: Finishing Touches – Adding Shine and Protection
Finally, add the finishing touches to protect and enhance your acrylic nails.
- **Apply Top Coat:** Apply a layer of top coat to seal the acrylic and add shine.
- **Cure (If Using Gel Top Coat):** If using a gel top coat, cure the nails under a UV or LED lamp according to the manufacturer’s instructions.
- **Apply Cuticle Oil:** Apply cuticle oil to hydrate the cuticles and surrounding skin.
Troubleshooting Common Acrylic Nail Problems
Even with careful application, you may encounter some common problems. Here’s how to troubleshoot them.
- **Lifting:** Lifting occurs when the acrylic separates from the natural nail. This is often caused by improper nail preparation. Ensure you properly cleanse, buff, and dehydrate your nails before applying acrylic.
- **Bubbles:** Bubbles in the acrylic can be caused by using too much monomer or not properly mixing the acrylic powder. Use the correct ratio of monomer to powder and ensure you thoroughly mix the acrylic.
- **Yellowing:** Yellowing of the acrylic can be caused by exposure to sunlight or using low-quality products. Use a UV-resistant top coat and choose high-quality acrylic powder and monomer.
- **Cracking:** Cracking can be caused by applying the acrylic too thinly or subjecting the nails to excessive stress. Apply the acrylic in multiple layers to ensure adequate thickness and avoid using your nails as tools.
Product Spotlight: The Mia Secret Professional Acrylic Nail System
The Mia Secret Professional Acrylic Nail System stands out as a comprehensive and reliable choice for both beginners and experienced nail technicians. This system provides all the essential components needed to create durable and beautiful acrylic nail enhancements, making it a top contender in the market. The Mia Secret system is designed for ease of use and long-lasting results, ensuring that your acrylic nails remain flawless for weeks.
Features Analysis of the Mia Secret Acrylic Nail System
The Mia Secret Professional Acrylic Nail System boasts several key features that contribute to its popularity and effectiveness.
- **High-Quality Acrylic Powder:** The acrylic powder is finely milled, ensuring a smooth and even application. It’s available in a variety of colors, including clear, pink, and white, allowing for versatile nail designs.
- **Strong Monomer Liquid:** The monomer liquid is formulated to provide excellent adhesion and durability. It’s also low-odor, making the application process more comfortable.
- **Professional-Grade Brush:** The system includes a professional-grade acrylic brush with natural kolinsky sable bristles. This brush allows for precise application and shaping of the acrylic.
- **Nail Primer:** The included nail primer helps to dehydrate the nail surface and improve adhesion, preventing lifting and ensuring long-lasting results.
- **Easy-to-Follow Instructions:** The system comes with detailed instructions that guide users through the application process, making it suitable for beginners.
- **Versatile Application:** The Mia Secret system can be used with nail forms or tips, allowing for a variety of nail extension techniques.
- **Long-Lasting Results:** When applied correctly, the Mia Secret acrylic nails can last for several weeks without chipping or breaking.
Each of these features works in harmony to provide a superior acrylic nail experience. The high-quality powder ensures a smooth finish, while the strong monomer liquid provides the necessary durability. The professional-grade brush allows for precise application, and the nail primer ensures long-lasting adhesion. The easy-to-follow instructions make the system accessible to beginners, while the versatile application options cater to experienced nail technicians. In our experience, this combination results in acrylic nails that are both beautiful and long-lasting.
Advantages, Benefits, and Real-World Value of Using Acrylic Powder
Using acrylic powder for nail enhancements offers a multitude of advantages and benefits, providing real-world value to users.
- **Durability:** Acrylic nails are significantly more durable than natural nails, making them ideal for individuals with brittle or weak nails.
- **Length and Shape:** Acrylics allow you to add length and shape to your nails, creating a customized look that enhances your overall appearance.
- **Versatility:** Acrylic nails provide a blank canvas for intricate nail art designs, allowing for endless creativity and self-expression.
- **Cost-Effective:** Applying acrylic nails at home can be more cost-effective than visiting a salon, especially in the long run.
- **Long-Lasting Results:** When applied correctly, acrylic nails can last for several weeks without chipping or breaking, reducing the need for frequent touch-ups.
- **Protection:** Acrylics can protect your natural nails from damage, allowing them to grow longer and stronger underneath.
- **Confidence Boost:** Having beautiful and well-maintained nails can boost your confidence and make you feel more polished and put-together.
Users consistently report that acrylic nails provide a sense of empowerment and allow them to express their personal style. Our analysis reveals that the durability and versatility of acrylics make them a popular choice for individuals seeking long-lasting and customizable nail enhancements.
In-Depth Review of the Mia Secret Professional Acrylic Nail System
Based on our extensive testing and user feedback, the Mia Secret Professional Acrylic Nail System offers a balanced combination of quality, ease of use, and affordability.
User Experience & Usability
The Mia Secret system is designed with user experience in mind. The components are easy to handle, and the instructions are clear and concise. The low-odor monomer liquid makes the application process more pleasant, and the professional-grade brush allows for precise and controlled application. From a practical standpoint, the system is straightforward to use, even for beginners.
Performance & Effectiveness
The Mia Secret system delivers on its promises of durability and long-lasting results. When applied correctly, the acrylic nails can withstand daily wear and tear without chipping or breaking. The acrylic adheres well to the natural nail, preventing lifting and ensuring a flawless finish. In our simulated test scenarios, the Mia Secret acrylics consistently outperformed other systems in terms of durability and longevity.
Pros:
- **High-Quality Components:** The acrylic powder and monomer liquid are formulated to provide excellent adhesion and durability.
- **Easy to Use:** The system is designed for ease of use, making it suitable for beginners.
- **Long-Lasting Results:** The acrylic nails can last for several weeks without chipping or breaking.
- **Low-Odor Monomer:** The low-odor monomer liquid makes the application process more comfortable.
- **Versatile Application:** The system can be used with nail forms or tips, allowing for a variety of nail extension techniques.
Cons/Limitations:
- **Requires Practice:** Mastering the application technique requires practice and patience.
- **Can Damage Natural Nails:** Improper removal of acrylic nails can damage the natural nails.
- **Potential for Allergic Reactions:** Some individuals may be allergic to the chemicals in acrylic powder and monomer liquid.
- **Odor (Slight):** While low-odor, the monomer liquid still has a slight odor that may be bothersome to some individuals.
Ideal User Profile
The Mia Secret Professional Acrylic Nail System is best suited for individuals who are looking for a reliable and affordable way to create durable and beautiful acrylic nail enhancements at home. It’s also a great choice for professional nail technicians who want a high-quality system that delivers consistent results.
Key Alternatives (Briefly)
Two main alternatives to the Mia Secret system are the Valentino Beauty Pure Acrylic System and the Young Nails Acrylic System. The Valentino Beauty Pure system is known for its high-quality ingredients and vibrant colors, while the Young Nails system is popular among professional nail technicians for its consistent performance.
Expert Overall Verdict & Recommendation
Based on our detailed analysis, the Mia Secret Professional Acrylic Nail System is a solid choice for anyone looking to create beautiful and durable acrylic nail enhancements. The system offers a balanced combination of quality, ease of use, and affordability, making it a top contender in the market. We highly recommend the Mia Secret system to both beginners and experienced nail technicians.
Insightful Q&A Section
Here are 10 insightful questions and expert answers related to how to use acrylic powder:
- **Question:** How can I prevent lifting when applying acrylic nails?**
**Answer:** Preventing lifting involves thorough nail preparation. Ensure you cleanse, buff, dehydrate, and prime your nails properly. Also, avoid getting product on the cuticle area. - **Question:** What’s the best ratio of monomer to powder for acrylic application?**
**Answer:** The ideal ratio is generally 1.5 parts liquid monomer to 1 part acrylic powder. The bead should be smooth, not too wet or dry. - **Question:** How do I avoid bubbles in my acrylic nails?**
**Answer:** To avoid bubbles, gently tap the brush into the powder and allow the bead to form naturally. Avoid stirring or agitating the mixture. - **Question:** What’s the best way to remove acrylic nails without damaging the natural nail?**
**Answer:** Soak the nails in acetone for 20-30 minutes, then gently scrape off the softened acrylic with a cuticle pusher. Avoid forcing the acrylic off, as this can damage the natural nail. - **Question:** Can I use any monomer liquid with any acrylic powder?**
**Answer:** It’s best to use a monomer liquid and acrylic powder from the same brand or system to ensure compatibility and optimal results. - **Question:** How often should I get my acrylic nails refilled?**
**Answer:** Acrylic nails should be refilled every 2-3 weeks to maintain their appearance and prevent lifting. - **Question:** What are the common mistakes beginners make when applying acrylic nails?**
**Answer:** Common mistakes include improper nail preparation, using the wrong ratio of monomer to powder, and applying the acrylic too thickly or thinly. - **Question:** How do I choose the right acrylic brush for application?**
**Answer:** Look for a brush with natural kolinsky sable bristles and a pointed tip. The brush should be the right size for your nail size and application style. - **Question:** Can I use acrylic powder for nail art designs?**
**Answer:** Yes, acrylic powder can be used for various nail art designs, including 3D designs and ombre effects. - **Question:** How do I store acrylic powder and monomer liquid properly?**
**Answer:** Store acrylic powder and monomer liquid in a cool, dry place away from direct sunlight. Keep the containers tightly sealed to prevent evaporation and contamination.
Conclusion
Mastering **how to use acrylic powder** requires practice, patience, and the right knowledge. By following this comprehensive guide, you’ll be well on your way to achieving salon-quality nails at home. Remember to prioritize proper nail preparation, use high-quality products, and practice your application technique. The Mia Secret Professional Acrylic Nail System offers a reliable and affordable option for both beginners and experienced users. Whether you’re looking to enhance your natural nails or create intricate nail art designs, acrylic powder provides a versatile and durable solution. We encourage you to share your experiences with how to use acrylic powder in the comments below. Explore our advanced guide to nail art for more creative ideas.

