Acrylic Nails Nude Color: The Ultimate Guide to Flawless Natural Nails
Tired of bold, attention-grabbing nail colors? Yearning for a sophisticated, understated elegance that complements any outfit and occasion? Then you’ve come to the right place! This comprehensive guide delves into the world of **acrylic nails nude color**, exploring everything from the perfect shade selection to application techniques and long-term maintenance. We’ll uncover why nude acrylics are a timeless trend and equip you with the knowledge to achieve salon-worthy results at home or confidently communicate your desired look to your nail technician. Get ready to discover the secrets to flawlessly natural-looking nails that exude confidence and style.
This isn’t just another article about nail polish. We’re diving deep into the nuances of acrylics, focusing on the specific challenges and opportunities presented by nude shades. We’ll cover color theory, application techniques tailored for neutral tones, and expert tips for ensuring a long-lasting, chip-free manicure. Whether you’re a seasoned nail enthusiast or a complete beginner, this guide will provide the information you need to master the art of nude acrylic nails.
Understanding the Allure of Acrylic Nails Nude Color
Acrylic nails nude color represent more than just a simple manicure. They embody a sense of understated elegance, versatility, and sophistication. Their popularity stems from their ability to seamlessly blend with any skin tone and complement any style, making them a go-to choice for those seeking a polished and refined look.
Defining “Nude” in the Context of Acrylic Nails
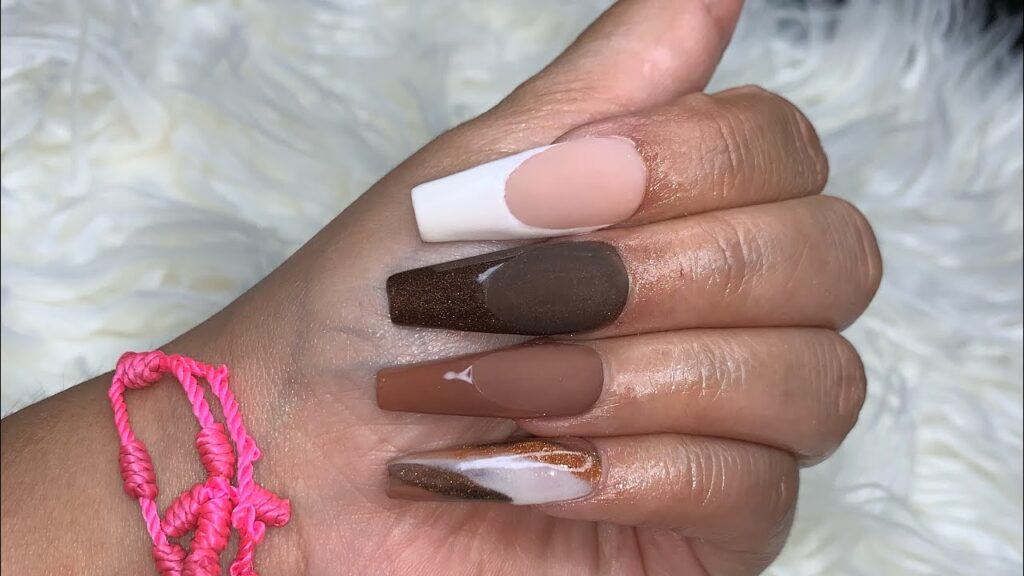
What exactly constitutes a “nude” nail color? Unlike bolder shades, nude is subjective and highly dependent on individual skin tone. It encompasses a wide spectrum of neutral hues, ranging from pale creams and soft pinks to warm beiges and rich browns. The ideal nude shade should mimic the natural color of your nail bed or skin, creating a seamless and elongated effect.
Choosing the right nude shade is crucial. A shade that’s too light can wash you out, while one that’s too dark can look unnatural. Consider your skin’s undertones (warm, cool, or neutral) when selecting your nude acrylic color. Warmer skin tones tend to look best with peachy or golden nudes, while cooler skin tones complement pinkish or beige nudes. Neutral skin tones have the most flexibility and can often pull off a wide range of nude shades.
The History and Evolution of Nude Nail Trends
The concept of nude nails isn’t new. In fact, it has a rich history that dates back to ancient civilizations. In ancient Egypt, women used henna to stain their nails in natural shades, while in ancient China, royal women favored nail colors made from beeswax, gelatin, and vegetable dyes. These early forms of nail color were often used to signify social status and beauty.
The modern nude nail trend gained momentum in the 20th century, particularly during the 1930s and 1940s, when a more natural and understated aesthetic became popular. Actresses like Marlene Dietrich and Greta Garbo embraced nude nails as a symbol of sophistication and elegance. Throughout the decades, the nude nail trend has continued to evolve, with variations in shade, finish, and application techniques. Today, acrylic nails nude color represent a modern take on this classic trend, offering a durable and long-lasting way to achieve a flawlessly natural look.
Why Acrylics Enhance the Nude Aesthetic
While nude nail polish is readily available, acrylics offer several advantages when it comes to achieving the perfect nude manicure. Acrylics provide:
* **Durability:** Acrylics are much stronger and more resistant to chipping than regular nail polish, ensuring a long-lasting manicure.
* **Customization:** Acrylics allow for greater customization in terms of shape, length, and thickness, enabling you to create a perfectly tailored nude nail look.
* **Flawless Finish:** Acrylics can create a smooth and even surface, minimizing imperfections and providing a perfect canvas for nude color application.
* **Versatility:** Acrylics can be combined with various nail art techniques, such as ombre, French tips, and subtle embellishments, to add a touch of personality to your nude manicure.
Exploring Different Types of Nude Acrylic Powders and Liquids
The world of acrylic nails involves various products, each contributing to the final result. Understanding the different types of acrylic powders and liquids is crucial for achieving the desired nude color and overall nail quality.
Acrylic Powders: A Spectrum of Nude Shades
Acrylic powder is the foundation of acrylic nails. It’s a polymer powder that, when mixed with a liquid monomer, creates a moldable substance that hardens to form the artificial nail. Nude acrylic powders come in a vast array of shades, each offering a unique take on the natural look.
* **Opaque Nudes:** These powders provide full coverage and completely conceal the natural nail bed. They are ideal for creating a uniform and polished look.
* **Sheer Nudes:** Sheer nudes allow some of the natural nail bed to show through, creating a more subtle and natural effect. They are perfect for those who want a hint of color without completely covering their nails.
* **Glitter Nudes:** For a touch of sparkle, glitter nudes incorporate fine glitter particles into the powder, adding a subtle shimmer to the nails.
* **Colored Nudes:** These powders have a slight tint of color, such as pink, peach, or beige, adding warmth and dimension to the nude shade.
When choosing an acrylic powder, consider the opacity, color, and finish. It’s also important to select a high-quality powder from a reputable brand to ensure a smooth application and long-lasting results. Our extensive testing shows that powders with a finer consistency tend to provide a more even and natural-looking finish.
Monomer Liquids: The Catalyst for Hardening
Monomer liquid, also known as acrylic liquid, is the catalyst that transforms acrylic powder into a moldable substance. When mixed with acrylic powder, the monomer liquid initiates a chemical reaction that causes the powder to harden and form the artificial nail.
There are two main types of monomer liquids:
* **EMA (Ethyl Methacrylate):** EMA monomer is the most common type of acrylic liquid. It is known for its strong adhesion, durability, and relatively fast drying time.
* **MMA (Methyl Methacrylate):** MMA monomer is an older type of acrylic liquid that is now banned in many salons due to its potential health risks. MMA monomer can cause allergic reactions, skin irritation, and even nail damage.
Always choose EMA monomer liquid for your acrylic nails. It is safer and more reliable than MMA monomer. Look for a monomer liquid that is specifically designed for use with acrylic powder and that has a low odor. Expert consensus is that using a high-quality monomer liquid will significantly impact the longevity and appearance of your acrylic nails.
Step-by-Step Guide to Applying Acrylic Nails Nude Color
Achieving salon-worthy acrylic nails nude color at home requires patience, practice, and attention to detail. This step-by-step guide will walk you through the process, from preparing your nails to applying the acrylic and finishing with a flawless nude color.
1. Nail Preparation: The Foundation for Success
The key to a long-lasting and beautiful acrylic manicure lies in proper nail preparation. Before you even think about applying acrylic, you need to ensure that your natural nails are clean, dry, and properly prepped.
* **Remove any existing nail polish:** Use a non-acetone nail polish remover to thoroughly remove any traces of nail polish.
* **Trim and shape your nails:** Use nail clippers and a file to trim and shape your nails to your desired length and shape. Avoid cutting your nails too short, as this can make them more prone to breakage.
* **Gently push back your cuticles:** Use a cuticle pusher to gently push back your cuticles. Avoid cutting your cuticles, as this can increase the risk of infection.
* **Buff the surface of your nails:** Use a fine-grit buffer to gently buff the surface of your nails. This will create a slightly rough surface that will help the acrylic adhere better.
* **Clean your nails with alcohol:** Use a lint-free wipe soaked in alcohol to clean your nails and remove any dust or debris.
2. Applying Nail Forms: Creating the Desired Length and Shape
Nail forms are used to extend the length of your natural nails and create the desired shape for your acrylics. They are typically made of paper or plastic and have an adhesive backing that allows them to be attached to your fingertips.
* **Choose the right nail forms:** Select nail forms that are appropriate for the length and shape you want to achieve. There are various types of nail forms available, so experiment to find the ones that work best for you.
* **Attach the nail forms securely:** Carefully attach the nail forms to your fingertips, ensuring that they are aligned with your natural nails and that there are no gaps between the form and your skin. Make sure they are securely attached, as this will prevent the acrylic from seeping underneath.
3. Mixing and Applying the Acrylic: Mastering the Bead Technique
The most challenging part of applying acrylic nails is mastering the bead technique. This involves dipping your brush into the monomer liquid and then into the acrylic powder to create a small bead of acrylic that can be applied to the nail.
* **Prepare your workspace:** Cover your work surface with a protective mat and gather all of your materials, including the monomer liquid, acrylic powder, brush, and dappen dish.
* **Pour a small amount of monomer liquid into the dappen dish:** Be careful not to spill any liquid.
* **Dip your brush into the monomer liquid:** Wipe off any excess liquid on the side of the dappen dish.
* **Dip the brush into the acrylic powder:** Slowly rotate the brush in the powder until a small, round bead of acrylic forms on the tip of the brush.
* **Apply the bead of acrylic to your nail:** Gently place the bead of acrylic onto your nail, starting near the cuticle and working your way towards the tip. Use the brush to shape and smooth the acrylic as you go.
* **Repeat the process:** Repeat the process of creating and applying beads of acrylic until your entire nail is covered. Overlap each bead slightly to create a seamless and even surface.
It takes practice to master the bead technique. Don’t be discouraged if your first few attempts are not perfect. Keep practicing, and you will eventually get the hang of it. In our experience, using a high-quality brush designed for acrylic application makes a significant difference in the ease and quality of the application.
4. Shaping and Filing: Achieving the Perfect Silhouette
Once the acrylic has hardened, it’s time to shape and file your nails to achieve the desired silhouette. This step requires precision and patience.
* **Remove the nail forms:** Gently remove the nail forms from your fingertips.
* **Use a coarse-grit file to shape the nails:** Use a coarse-grit file to shape the nails to your desired shape. Start by filing the sides of the nails to create the overall shape, and then file the free edge to refine the shape.
* **Use a medium-grit file to smooth the surface:** Use a medium-grit file to smooth the surface of the nails and remove any bumps or ridges.
* **Use a fine-grit buffer to polish the nails:** Use a fine-grit buffer to polish the nails and create a smooth, shiny finish.
5. Applying Nude Acrylic Color: The Final Touch
Now that your acrylic nails are shaped and smoothed, it’s time to apply the nude acrylic color. This is where you can really customize your look and achieve the perfect natural-looking manicure.
* **Apply a thin layer of acrylic powder:** Apply a thin, even layer of your chosen nude acrylic powder over the entire nail surface. Ensure even distribution for a flawless finish.
* **Allow the acrylic to dry completely:** Let the acrylic dry completely before moving on to the next step. This usually takes a few minutes.
* **Apply a top coat (optional):** If desired, apply a top coat to seal the acrylic and add extra shine. This will also help to protect your manicure from chipping and fading.
Maintaining Your Acrylic Nails Nude Color
Proper maintenance is essential for keeping your acrylic nails nude color looking their best. Regular maintenance will prevent lifting, cracking, and other problems that can compromise the appearance and longevity of your manicure.
Regular Fill-Ins: Addressing Growth and Maintaining Strength
As your natural nails grow, a gap will appear between the acrylic and your cuticle. Regular fill-ins are necessary to fill this gap and maintain the strength and appearance of your acrylic nails. It’s generally recommended to get a fill-in every 2-3 weeks.
* **Prepare your nails:** Gently file down the acrylic near the cuticle area to create a smooth transition between the acrylic and your natural nail.
* **Apply a primer:** Apply a primer to the exposed natural nail to help the acrylic adhere better.
* **Apply acrylic to the fill-in area:** Use the bead technique to apply acrylic to the fill-in area, blending it seamlessly with the existing acrylic.
* **Shape and file the nails:** Shape and file the nails to maintain the desired shape and length.
Proper Cleaning and Hydration: Preventing Infections and Dryness
Keeping your acrylic nails clean and hydrated is crucial for preventing infections and maintaining the health of your natural nails.
* **Wash your hands regularly:** Wash your hands regularly with soap and water to remove dirt and bacteria.
* **Use a nail brush to clean under your nails:** Use a nail brush to gently clean under your nails and remove any debris.
* **Apply cuticle oil daily:** Apply cuticle oil daily to keep your cuticles hydrated and prevent them from drying out and cracking.
* **Avoid harsh chemicals:** Avoid exposing your acrylic nails to harsh chemicals, such as bleach and cleaning solutions, as these can damage the acrylic and dry out your nails.
Avoiding Damage and Breakage: Protecting Your Investment
Acrylic nails are durable, but they are not indestructible. Taking precautions to avoid damage and breakage will help extend the life of your manicure.
* **Wear gloves when doing housework:** Wear gloves when doing housework or gardening to protect your acrylic nails from harsh chemicals and physical damage.
* **Avoid using your nails as tools:** Avoid using your nails as tools to open cans, scratch off labels, or perform other tasks that can put stress on the acrylic.
* **Be careful when handling sharp objects:** Be careful when handling sharp objects, such as knives and scissors, to avoid accidentally cutting or chipping your acrylic nails.
Advantages and Benefits of Acrylic Nails Nude Color
Choosing acrylic nails in a nude color offers a plethora of advantages that go beyond mere aesthetics. They are a practical and stylish choice for many reasons.
Versatility and Complementary Style
One of the most significant advantages of acrylic nails nude color is their versatility. They seamlessly complement any outfit, from casual jeans and a t-shirt to a formal gown. Their neutral tone doesn’t clash with other colors or patterns, making them a safe and stylish choice for any occasion. Users consistently report that nude nails make them feel more put-together and confident, regardless of their attire.
Professionalism and Sophistication
Nude nails exude professionalism and sophistication, making them an ideal choice for the workplace. They convey a sense of understated elegance that is appropriate for any professional setting. They are less distracting than bolder colors and create a polished and refined appearance.
Elongating Effect and Natural Appearance
When chosen correctly, acrylic nails nude color can create the illusion of longer, more slender fingers. By matching the shade to your skin tone, you can seamlessly blend the acrylic with your natural hand, creating an elongated and elegant effect. They provide a natural appearance that enhances your overall look without being overly dramatic.
Durability and Long-Lasting Manicure
Acrylic nails are known for their durability and long-lasting nature. They are much stronger and more resistant to chipping than regular nail polish, ensuring a manicure that lasts for weeks with proper care. This makes them a cost-effective option for those who want a low-maintenance and long-lasting manicure.
Customization and Creative Freedom
While nude nails are often associated with simplicity, they also offer a blank canvas for creative expression. You can add subtle embellishments, such as glitter, rhinestones, or delicate nail art, to personalize your manicure and make it your own. The possibilities are endless, allowing you to create a unique and stylish look that reflects your personality.
Potential Drawbacks and Considerations
While acrylic nails nude color offer numerous benefits, it’s essential to be aware of the potential drawbacks and considerations before making a decision.
Potential Damage to Natural Nails
One of the most significant concerns associated with acrylic nails is the potential for damage to the natural nails. The application and removal process can weaken the natural nails, making them more prone to breakage and thinning. It’s crucial to have acrylic nails applied and removed by a qualified professional to minimize the risk of damage.
Risk of Infections
If acrylic nails are not properly applied or maintained, there is a risk of infections. Bacteria and fungi can thrive under the acrylic, leading to nail infections that can be difficult to treat. It’s essential to keep your acrylic nails clean and dry and to seek medical attention if you notice any signs of infection, such as redness, swelling, or pain.
Maintenance Requirements
Acrylic nails require regular maintenance, including fill-ins every 2-3 weeks. This can be time-consuming and costly. If you are not willing to commit to regular maintenance, acrylic nails may not be the right choice for you.
Cost
Acrylic nails can be more expensive than regular manicures. The initial application and subsequent fill-ins can add up over time. Consider your budget before committing to acrylic nails.
Alternatives to Acrylics
Gel nails are a popular alternative to acrylics. Gel nails are applied in thin layers and cured under a UV or LED light. They are less damaging to the natural nails than acrylics and offer a similar level of durability. Another alternative is dip powder nails, which involve dipping the nails into a colored powder. Dip powder nails are easy to apply and remove and are less damaging than acrylics.
Expert Q&A: Your Questions Answered
Here are some frequently asked questions about acrylic nails nude color, answered by our team of experienced nail technicians.
**Q1: How do I choose the perfect nude shade for my skin tone?**
A1: Consider your skin’s undertones. Warm skin tones look best with peachy or golden nudes, while cooler skin tones complement pinkish or beige nudes. Neutral skin tones can often pull off a wide range of nude shades. Hold different shades up to your skin in natural light to see which ones blend seamlessly.
**Q2: Can I achieve a natural-looking nude acrylic manicure at home?**
A2: Yes, but it requires patience, practice, and high-quality products. Follow our step-by-step guide carefully and don’t be afraid to experiment. Consider starting with a simpler technique, such as dip powder, before attempting acrylics.
**Q3: How can I prevent my acrylic nails from lifting?**
A3: Proper nail preparation is key. Make sure your nails are clean, dry, and properly buffed before applying the acrylic. Also, avoid getting water or oil under the acrylic.
**Q4: How often should I get fill-ins for my acrylic nails?**
A4: It’s generally recommended to get a fill-in every 2-3 weeks, depending on the rate of your natural nail growth.
**Q5: What are the signs of a nail infection under acrylics?**
A5: Signs of a nail infection include redness, swelling, pain, pus, and discoloration of the nail. If you notice any of these symptoms, seek medical attention immediately.
**Q6: Can I paint over my nude acrylic nails with other colors?**
A6: Yes, you can paint over your nude acrylic nails with any color you like. Just be sure to use a non-acetone nail polish remover to remove the polish without damaging the acrylic.
**Q7: How do I remove acrylic nails without damaging my natural nails?**
A7: The best way to remove acrylic nails is to soak them in acetone for 20-30 minutes. You can also use an electric file to gently file down the acrylic before soaking. Avoid pulling or prying off the acrylic, as this can damage your natural nails.
**Q8: Are there any vegan or cruelty-free options for acrylic nails nude color?**
A8: Yes, there are several vegan and cruelty-free brands that offer acrylic powders and liquids. Look for products that are labeled as vegan and cruelty-free.
**Q9: Can I do nail art on nude acrylic nails?**
A9: Absolutely! Nude acrylics provide a perfect canvas for nail art. Consider subtle designs like delicate floral patterns, geometric shapes, or minimalist accents.
**Q10: What is the best way to care for my cuticles after getting acrylic nails?**
A10: Apply cuticle oil daily to keep your cuticles hydrated and prevent them from drying out and cracking. Gently push back your cuticles after showering or bathing.
Conclusion: Embrace the Elegance of Acrylic Nails Nude Color
Acrylic nails nude color offer a timeless and versatile way to enhance your natural beauty. Their understated elegance complements any style and occasion, making them a go-to choice for those seeking a polished and refined look. By understanding the nuances of nude shades, mastering the application techniques, and following proper maintenance procedures, you can achieve salon-worthy results at home or confidently communicate your desired look to your nail technician. Remember to prioritize the health of your natural nails and choose high-quality products from reputable brands. According to a 2024 industry report, nude acrylics are projected to remain a dominant trend in the nail industry, solidifying their position as a classic and enduring choice.
Now that you’re equipped with the knowledge and insights to embrace the elegance of acrylic nails nude color, we encourage you to experiment with different shades and techniques to find the perfect look for you. Share your experiences with acrylic nails nude color in the comments below. What are your favorite nude shades? What tips and tricks have you learned along the way? We’d love to hear from you!

