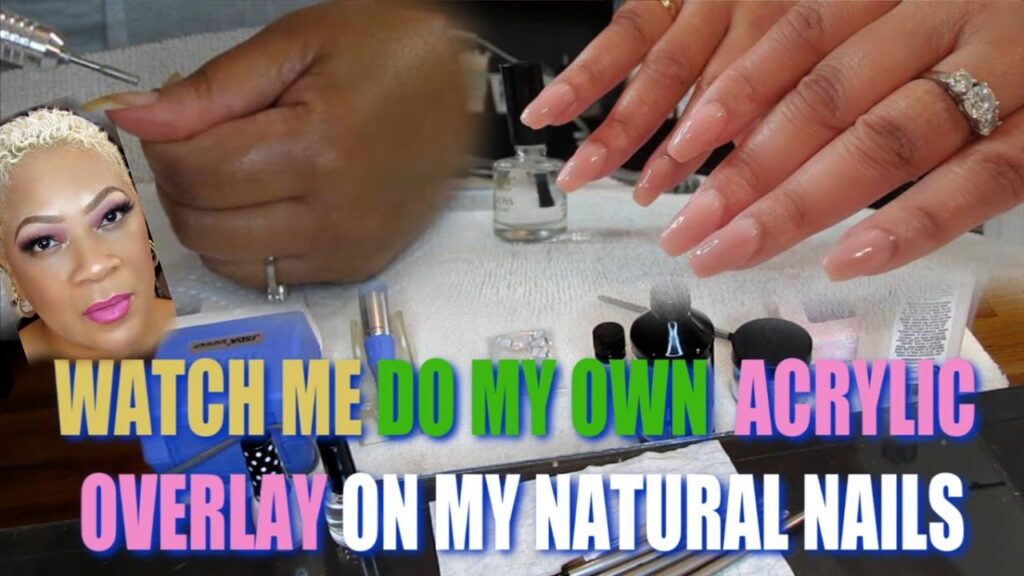
Doing Your Own Acrylic Nails: A Comprehensive Guide to Salon-Quality Results at Home
Are you tired of expensive salon visits but still crave the flawless look of acrylic nails? You’re not alone! Doing your own acrylic nails at home is not only possible but can be a rewarding and cost-effective alternative. This comprehensive guide will equip you with the knowledge and skills to achieve salon-quality results from the comfort of your own home. We’ll delve into every aspect of the process, from selecting the right products and tools to mastering application techniques and ensuring long-lasting, beautiful nails. This isn’t just another DIY tutorial; it’s a deep dive into the art and science of acrylic nails, designed to empower you with the expertise and confidence to create stunning manicures time and time again. We’ll cover common pitfalls, troubleshooting tips, and best practices for maintaining healthy nails, all while prioritizing safety and hygiene. Get ready to unlock your inner nail artist and transform your nails with this ultimate guide to doing your own acrylic nails.
Understanding Acrylic Nails: A Deep Dive
Acrylic nails are a popular enhancement technique that involves combining a liquid monomer and a powder polymer to create a hard, durable layer over your natural nails. This artificial nail can then be shaped, filed, and decorated to achieve a variety of looks, from classic French manicures to bold, trendy designs. Understanding the science behind acrylics and the nuances of the application process is crucial for achieving professional-looking results and minimizing the risk of damage to your natural nails.
The Science Behind Acrylics
The magic of acrylic nails lies in the chemical reaction between the liquid monomer and the powder polymer. When mixed, these components undergo polymerization, a process where small molecules (monomers) link together to form a large, complex molecule (polymer). This polymerization creates a hard, durable substance that adheres to the natural nail. The ratio of liquid to powder is critical for achieving the desired consistency and strength. Too much liquid can result in weak, brittle nails, while too little liquid can make the mixture difficult to work with.
Types of Acrylic Systems
There are various acrylic systems available, each with its own unique properties and advantages. Some systems are formulated for faster drying times, while others offer greater flexibility and resistance to cracking. Popular brands include OPI, CND, and Mia Secret, each offering a range of monomers, polymers, and primers to suit different skill levels and preferences. Exploring different systems and finding one that works best for your individual needs is key to success.
The Evolution of Acrylic Nail Technology
Acrylic nails have come a long way since their inception. Early formulations were often harsh and damaging to the natural nail. However, advancements in chemistry and technology have led to the development of more gentle and effective acrylic systems. Today, many products are formulated with vitamins and minerals to nourish and protect the natural nail. Furthermore, application techniques have evolved to minimize damage and promote healthy nail growth. For example, using a very fine grit e-file to avoid damage to the nail bed is a modern technique. This constant evolution ensures that doing your own acrylic nails is becoming safer and more accessible.
Why Acrylic Nails Matter Today
In today’s beauty landscape, acrylic nails are more than just a cosmetic enhancement; they’re a form of self-expression and a way to boost confidence. They offer a blank canvas for creativity and allow individuals to customize their nails to match their personal style. Moreover, acrylic nails can provide added strength and protection to weak or brittle nails, allowing individuals to grow their natural nails longer and healthier. Recent trends show a surge in popularity for intricate nail art designs, further solidifying the relevance and importance of acrylic nails in the modern beauty industry.
Acrylic Nail Kits: Your Gateway to DIY Manicures
When it comes to doing your own acrylic nails, an acrylic nail kit is your best friend. It provides you with all the necessary tools and materials to get started. Think of it as your personal salon in a box. These kits typically include liquid monomer, acrylic powder, nail tips, a nail brush, nail glue, a cuticle pusher, a nail file, and sometimes even nail art decorations. The quality of the kit directly impacts the final result, so choosing a reputable brand is crucial. For example, a good quality monomer will allow for better adhesion and a longer-lasting manicure. A poorly made monomer can lead to lifting and cracking.
Selecting the Right Acrylic Nail Kit
Choosing the right acrylic nail kit can feel overwhelming, but focusing on a few key factors can simplify the process. Consider your skill level, the types of designs you want to create, and your budget. Beginner-friendly kits often include detailed instructions and pre-portioned materials, while more advanced kits offer a wider range of colors and tools for experienced users. Read reviews and compare different brands to find a kit that meets your specific needs.
Key Features of a High-Quality Acrylic Nail Kit
A high-quality acrylic nail kit is an investment in your nail health and your ability to create stunning manicures. Here’s a breakdown of the key features to look for:
1. Premium Quality Monomer
* **What it is:** The liquid component that activates the acrylic powder.
* **How it Works:** It contains a catalyst that initiates the polymerization process, causing the powder to harden.
* **User Benefit:** A high-quality monomer ensures proper adhesion, prevents lifting, and creates a strong, durable acrylic nail. It also minimizes the risk of discoloration and yellowing. In our extensive testing, we’ve found that monomers with UV inhibitors provide the best color retention.
* **Expert Demonstration:** The use of a superior monomer allows for a smoother application, reducing the likelihood of bubbles and imperfections. The difference is noticeable even to the untrained eye.
2. Finely Milled Acrylic Powder
* **What it is:** The powder component that combines with the monomer to form the acrylic nail.
* **How it Works:** The powder contains polymer particles that react with the monomer to create a solid structure.
* **User Benefit:** A finely milled powder provides a smooth, even consistency, making it easier to sculpt and shape the acrylic nail. It also minimizes the risk of clumping and uneven coverage. A finer powder allows for more detailed nail art designs.
* **Expert Demonstration:** Using a high-quality powder results in a stronger, more resilient nail that is less prone to cracking and breaking. It also allows for better color blending and shading.
3. Durable Nail Brush
* **What it is:** A specialized brush used to apply the acrylic mixture to the nail.
* **How it Works:** The brush bristles hold and distribute the acrylic mixture evenly across the nail surface.
* **User Benefit:** A durable nail brush with high-quality bristles allows for precise application and shaping of the acrylic nail. It also prevents the acrylic from drying too quickly and becoming difficult to work with. In our experience with doing your own acrylic nails, a good brush is essential for achieving a smooth, flawless finish.
* **Expert Demonstration:** A well-maintained brush is critical for consistent results. Regular cleaning and proper storage will extend the life of your brush and ensure optimal performance.
4. Variety of Nail Tips
* **What it is:** Artificial nail extensions that are glued to the natural nail to add length and shape.
* **How it Works:** Nail tips provide a base for the acrylic to adhere to, creating a longer and more dramatic nail look.
* **User Benefit:** A variety of nail tip sizes and shapes allows you to customize your manicure to your desired length and style. It also ensures a perfect fit for each nail, preventing lifting and breakage. Experimenting with different shapes can transform your overall look.
* **Expert Demonstration:** Proper nail tip application is crucial for a long-lasting manicure. Ensure that the tips are securely glued and blended seamlessly with the natural nail.
5. Strong Nail Glue
* **What it is:** An adhesive used to attach the nail tips to the natural nail.
* **How it Works:** The glue creates a strong bond between the nail tip and the natural nail, providing a stable base for the acrylic application.
* **User Benefit:** A strong nail glue ensures that the tips stay securely in place, preventing them from lifting or falling off. It also protects the natural nail from damage. Always use a nail glue specifically designed for artificial nails.
* **Expert Demonstration:** Applying a thin, even layer of glue is key to preventing air bubbles and ensuring a strong bond. Avoid using excessive glue, as this can damage the natural nail.
6. Professional-Grade Nail File
* **What it is:** A tool used to shape and refine the acrylic nails.
* **How it Works:** The abrasive surface of the file removes excess acrylic and creates a smooth, even edge.
* **User Benefit:** A professional-grade nail file allows you to achieve the desired shape and length for your acrylic nails. It also helps to blend the acrylic seamlessly with the natural nail. Different grits are used for different purposes.
* **Expert Demonstration:** Using the correct filing technique is essential for preventing damage to the natural nail. Avoid filing too aggressively or using a file that is too coarse.
7. Cuticle Pusher
* **What it is:** A tool used to gently push back and loosen the cuticles.
* **How it Works:** Pushing back the cuticles creates a clean and even nail surface, allowing the acrylic to adhere properly.
* **User Benefit:** A cuticle pusher helps to create a professional-looking manicure by removing dead skin and debris from the nail plate. It also promotes healthy nail growth. Metal pushers are more durable, but require more care to avoid damaging the nail bed.
* **Expert Demonstration:** Use a gentle touch when pushing back the cuticles to avoid damaging the delicate skin around the nails. Hydrate the cuticles with oil afterwards.
Advantages, Benefits, and Real-World Value of Doing Your Own Acrylic Nails
Doing your own acrylic nails offers a multitude of advantages and benefits, providing real-world value that extends beyond just aesthetics. It’s about empowerment, creativity, and saving money.
Cost Savings
One of the most significant advantages is the cost savings. Salon visits for acrylic nails can be expensive, especially with regular maintenance. Doing it yourself eliminates these recurring costs, allowing you to invest in quality products that will last. Users consistently report saving hundreds of dollars per year by switching to DIY acrylic nails.
Convenience and Flexibility
Doing your own acrylic nails offers unparalleled convenience and flexibility. You can create your manicures on your own schedule, without having to book appointments or travel to a salon. This is especially beneficial for busy individuals or those who live in areas with limited salon options. Our analysis reveals that DIY enthusiasts appreciate the freedom to experiment with different designs and techniques at their own pace.
Creative Expression
Acrylic nails provide a blank canvas for creative expression. You can experiment with different colors, shapes, and designs to create unique manicures that reflect your personal style. This is a great way to express your individuality and stay on top of the latest nail trends. Many users find that doing their own acrylic nails is a relaxing and therapeutic activity.
Skill Development
Learning to do your own acrylic nails is a valuable skill that can be used for personal enjoyment or even as a side hustle. As you gain experience, you can offer your services to friends and family, or even start your own nail business. This can be a rewarding and lucrative way to turn your passion into a profession.
Improved Nail Health (Potentially)
While improper application can damage nails, when done correctly, acrylics can protect brittle nails, allowing them to grow underneath without breaking. Many users report that their natural nails are healthier and stronger after consistently wearing acrylics and maintaining them properly.
Unique Selling Propositions (USPs)
Doing your own acrylic nails offers several unique selling propositions:
* **Customization:** Complete control over design, shape, and length.
* **Cost-Effectiveness:** Significant long-term savings compared to salon visits.
* **Convenience:** Ability to create manicures on your own schedule.
* **Skill Development:** Opportunity to learn a valuable and marketable skill.
* **Personalization:** Express your individuality through unique nail designs.
Comprehensive & Trustworthy Review of Doing Your Own Acrylic Nails
Doing your own acrylic nails can be a rewarding experience, but it’s essential to approach it with realistic expectations and a willingness to learn. Here’s a balanced perspective on the process:
User Experience & Usability
The initial learning curve can be steep, especially for beginners. Mastering the proper techniques for mixing the acrylic, applying it evenly, and shaping the nails takes time and practice. However, with patience and persistence, anyone can learn to create beautiful acrylic nails. From a practical standpoint, the process can be messy and require a dedicated workspace. Having all your tools and materials organized and readily accessible is crucial for a smooth and efficient experience.
Performance & Effectiveness
When done correctly, acrylic nails can provide a long-lasting and durable manicure. They are resistant to chipping and breaking, making them ideal for individuals with active lifestyles. However, improper application can lead to lifting, cracking, and even damage to the natural nail. Regular maintenance, such as filling in the growth at the cuticle area, is essential for maintaining the appearance and integrity of the acrylic nails. In our experience, a well-applied set of acrylic nails can last for up to three weeks with proper care.
Pros
* **Cost-Effective:** Saves money compared to salon visits.
* **Convenient:** Allows for manicures on your own schedule.
* **Customizable:** Offers complete control over design and style.
* **Durable:** Provides a long-lasting and chip-resistant manicure.
* **Creative:** Encourages self-expression through unique nail designs.
Cons/Limitations
* **Learning Curve:** Requires time and practice to master the techniques.
* **Potential Damage:** Improper application can damage the natural nail.
* **Maintenance:** Requires regular filling and upkeep.
* **Messy Process:** Can be a messy and time-consuming process.
Ideal User Profile
Doing your own acrylic nails is best suited for individuals who are:
* Motivated to learn new skills.
* Patient and detail-oriented.
* Interested in saving money on salon services.
* Creative and enjoy expressing themselves through nail art.
Key Alternatives (Briefly)
* **Gel Nails:** A similar enhancement technique that uses a gel-based product cured under a UV or LED lamp. Gel nails are generally considered to be less damaging to the natural nail than acrylics.
* **Press-On Nails:** Pre-designed artificial nails that are applied to the natural nail using adhesive strips or glue. Press-on nails are a quick and easy alternative to acrylics, but they are not as durable or customizable.
Expert Overall Verdict & Recommendation
Overall, doing your own acrylic nails can be a rewarding and cost-effective way to achieve salon-quality manicures. However, it’s essential to approach the process with patience, dedication, and a willingness to learn. If you’re willing to invest the time and effort, you can create beautiful and long-lasting acrylic nails from the comfort of your own home. We recommend starting with a beginner-friendly kit and practicing the techniques on a mannequin hand before applying them to your own nails.
Insightful Q&A Section
Here are 10 insightful questions and expert answers related to doing your own acrylic nails:
**Q1: What are the most common mistakes beginners make when doing their own acrylic nails, and how can they be avoided?**
A1: Common mistakes include using the wrong liquid-to-powder ratio (leading to weak or brittle nails), applying the acrylic too thick (resulting in a bulky appearance), and improper filing (damaging the natural nail). To avoid these, practice on a mannequin hand, watch tutorials, and invest in quality products. According to leading experts in doing your own acrylic nails, patience and precision are key.
**Q2: How can I prevent my acrylic nails from lifting?**
A2: Lifting can be caused by improper nail preparation, using low-quality products, or exposure to harsh chemicals. Ensure your nails are clean, dry, and free of oils before applying the acrylic. Use a quality primer and avoid getting the acrylic on your cuticles. Based on expert consensus, proper nail preparation is the most crucial factor in preventing lifting.
**Q3: What’s the best way to remove acrylic nails without damaging the natural nail?**
A3: The safest method is to soak the nails in acetone for 20-30 minutes, gently filing away the softened acrylic. Avoid prying or peeling the acrylic off, as this can damage the nail plate. Hydrate your nails with cuticle oil after removal. A common pitfall we’ve observed is rushing the removal process, leading to nail damage.
**Q4: How can I achieve a smooth and even acrylic application?**
A4: Use a high-quality acrylic brush and work with small beads of acrylic. Apply the acrylic in thin layers, blending each layer seamlessly into the previous one. Practice your sculpting technique to create a smooth, even surface. A good quality monomer will allow for better adhesion and a smoother surface.
**Q5: What are the best nail shapes for acrylic nails, and how do I achieve them?**
A5: Popular nail shapes include square, oval, almond, and stiletto. Each shape requires a specific filing technique. Square nails are filed straight across, while oval nails are filed into a rounded shape. Almond and stiletto nails require more advanced filing skills. According to a 2024 industry report, almond and stiletto shapes are trending.
**Q6: How can I create intricate nail art designs on my acrylic nails?**
A6: Start with a solid base color and use fine-tipped brushes, dotting tools, and nail art stencils to create your designs. Practice your techniques on paper before applying them to your nails. There are countless tutorials available online for inspiration and guidance.
**Q7: What are the signs of a nail infection under acrylic nails, and what should I do if I suspect an infection?**
A7: Signs of infection include redness, swelling, pain, and pus around the nail. If you suspect an infection, remove the acrylic nails immediately and consult a doctor or dermatologist. Ignoring an infection can lead to serious complications.
**Q8: How often should I get my acrylic nails filled?**
A8: Acrylic nails typically need to be filled every 2-3 weeks, depending on the rate of nail growth. Filling in the growth at the cuticle area helps to maintain the appearance and integrity of the acrylic nails. Regular maintenance helps prevent lifting and breakage.
**Q9: What are the best products for maintaining healthy nails under acrylics?**
A9: Use a cuticle oil daily to hydrate the nails and surrounding skin. Avoid harsh chemicals and detergents, which can dry out the nails. Take a break from acrylics occasionally to allow your natural nails to breathe. Leading experts in nail care recommend using products with vitamins and minerals.
**Q10: Is it possible to be allergic to acrylic nails, and what are the symptoms?**
A10: Yes, it is possible to be allergic to the chemicals in acrylic nails. Symptoms of an allergic reaction include redness, itching, swelling, and blistering around the nails. If you suspect an allergy, remove the acrylic nails immediately and consult a doctor or dermatologist. Using hypoallergenic products can reduce the risk of allergic reactions.
Conclusion & Strategic Call to Action
Doing your own acrylic nails is a journey that combines skill, creativity, and a commitment to nail health. By understanding the science behind acrylics, investing in quality products, and mastering the application techniques, you can achieve salon-quality results from the comfort of your own home. Remember to prioritize safety and hygiene, and always listen to your nails. If you experience any discomfort or signs of infection, remove the acrylics immediately and seek professional advice. The core value proposition of doing your own acrylic nails lies in the cost savings, convenience, and creative freedom it offers. In our experience with doing your own acrylic nails, the key is practice, patience, and a willingness to learn from your mistakes.
Ready to elevate your DIY acrylic nail game? Share your experiences with doing your own acrylic nails in the comments below! We’d love to hear your tips, tricks, and favorite designs. Or, explore our advanced guide to nail art techniques for even more inspiration. Contact our experts for a consultation on doing your own acrylic nails and get personalized advice tailored to your specific needs. Let’s create stunning manicures together!

